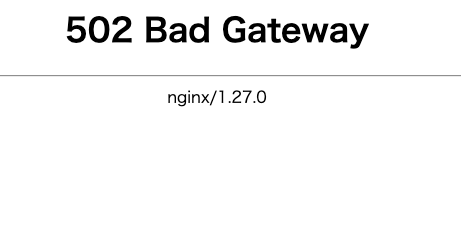
Laravel Valetを使用している方でこの現象になるのは、直前にbrewアップデートを行ったことが原因だと思います。私もbrewアップデートが走って環境が壊れてこの502エラーになりました。brewで環境が崩れて厄介ではありますが、結構簡単に直る方法がありますで紹介します。

Valetをアンインストールする
早速、「え?」と思われそうですが、これが一番手っ取り早いです。次のコマンドでvaletをアンインストールします。
valet uninstall実行すると次のように返ってきます。
**********@MacBookAirM3 ~ % valet uninstall

You did not pass the --force parameter, so this will only return instructions on how to uninstall, not ACTUALLY uninstall anything.
A --force removal WILL delete your custom configuration information, so be sure to make backups first.

IF YOU WANT TO UNINSTALL VALET MANUALLY, DO THE FOLLOWING...

1. Valet Keychain Certificates
Before removing Valet configuration files, we recommend that you run valet unsecure --all to clean up the certificates that Valet inserted into your Keychain.
Alternatively you can do a search for @laravel.valet in Keychain Access and delete those certificates there manually.

2. Valet Configuration Files
You may remove your user-specific Valet config files by running:  rm -rf ~/.config/valet

3. Remove Valet package
You can run composer global remove laravel/valet to uninstall the Valet package.

4. Homebrew Services
You may remove the core services (php, nginx, dnsmasq) by running: brew uninstall --force php nginx dnsmasq
You can then remove selected leftover configurations for these services manually in both /opt/homebrew/etc/ and /opt/homebrew/logs/.
(If you have other PHP versions installed, run brew list --formula | grep php to see which versions you should also uninstall manually.)

BEWARE: Uninstalling PHP via Homebrew will leave your Mac with its original PHP version, which may not be compatible with other Composer dependencies you have installed. As a result, you may get unexpected errors.

If you have customized your Mac DNS settings in System Preferences->Network, you may need to add or remove 127.0.0.1 from the top of that list.

5. GENERAL TROUBLESHOOTING
If your reasons for considering an uninstall are more for troubleshooting purposes, consider running brew doctor and/or brew cleanup to see if any problems exist there.
Also consider running sudo nginx -t to test your nginx configs in case there are failures/errors there preventing nginx from running.
Most of the nginx configs used by Valet are in your ~/.config/valet/Nginx directory.

You might also want to investigate your global Composer configs. Helpful commands include:
composer global update to apply updates to packages
composer global outdated to identify outdated packages
composer global diagnose to run diagnostics

Stopping phpfpm...
Stopping php@8.2...
Stopping nginx...
valetを再度インストールする
valetのアンインストールが完了したら、再度valetをインストールしなおします。
valet install結果は次のとおり。
**********@MacBookAirM3 ~ % valet install
Password:
Stopping nginx...

Installing nginx configuration...
Installing nginx directory...

Installing and configuring phpfpm...
Updating PHP configuration for php@8.4...
Restarting php...

Updating Dnsmasq configuration...
Restarting dnsmasq...
Valet is configured to serve for TLD [.test]

The [********.test] site has been secured with a fresh TLS certificate.
The [********.test] site has been secured with a fresh TLS certificate.
The [********.test] site has been secured with a fresh TLS certificate.
The [********.test] site has been secured with a fresh TLS certificate.
The [********.test] site has been secured with a fresh TLS certificate.
The [********.test] site has been secured with a fresh TLS certificate.
Restarting nginx...


Valet installed successfully!
まとめ
見た感じ、phpのバージョンが上がっているので必要に応じて変更した方が良いかもしれません。また、valet secureでhttps化していたものはそのまま引き継がれていたり、リンクしていたものもそのままでしたので別途設定し直す必要はなさそうです。


